Discussions and help related to Stripmaps tools
Introduction to the Rubicon Stripmap Tool
|
Philip van der Wel Administrator Posts: 10
11/29/2016
|
The Stripmap tool is a very useful Rubicon Toolbox feature, giving you the ability to display project data in a series of highly customisable strips.
There are five types of strips available:
1. Bar
2. Scatter Plot
3. Block
4. Text
5. Ruler
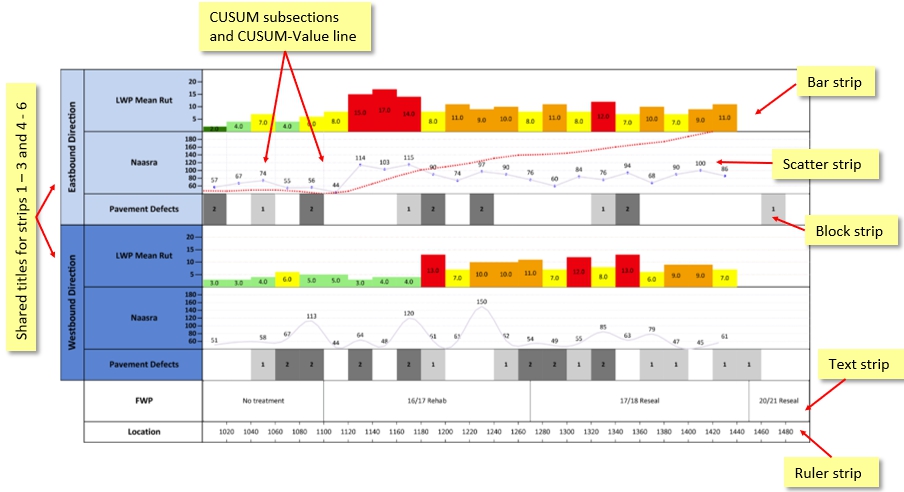
The image below is an example of a typical Stripmap, showing the rutting, roughness, and pavement defects in both directions, as well as planned treatments for the area and a location strip.

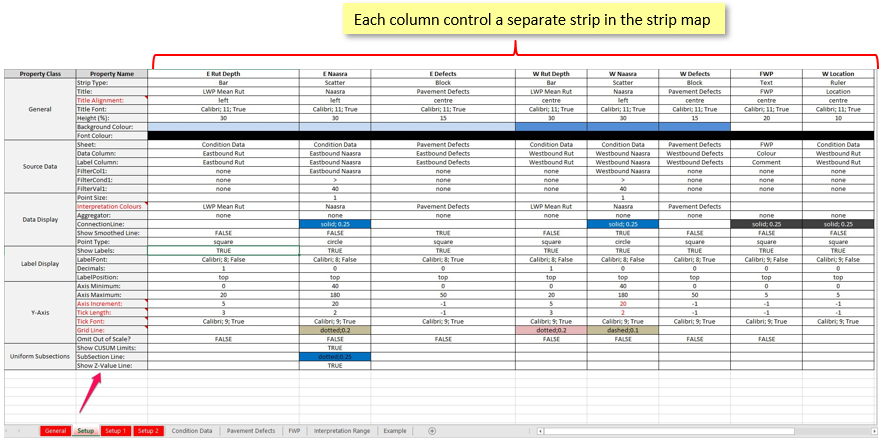
The Stripmap is run by an Excel template with a number of mandatory worksheets – General, Setup and Interpretation Range – as well as other worksheets containing the project data displayed in the strips. (The example above is controlled by the following sheets.)
The worksheet titled Setup is where the strips are set up, one column for each strip. Click here to see a separate Help Post containing further information on the Setup sheet.
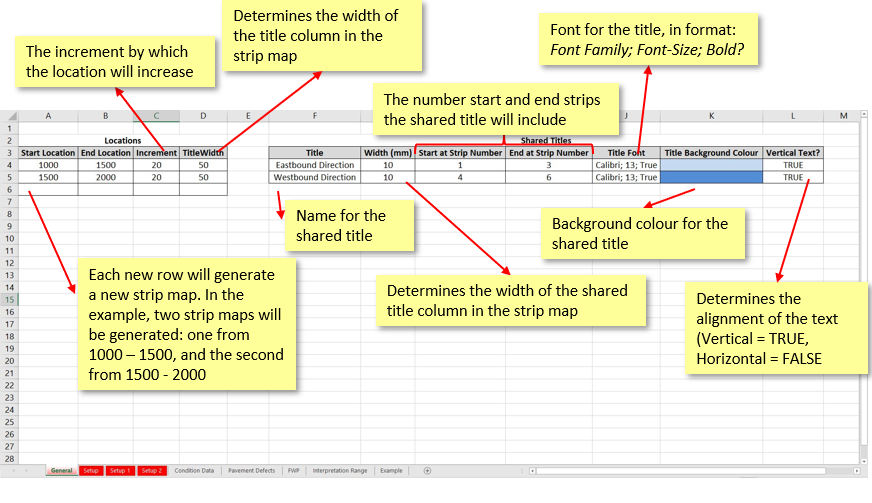
The General sheet controls the Locations, Shared Titles and Vertical lines.
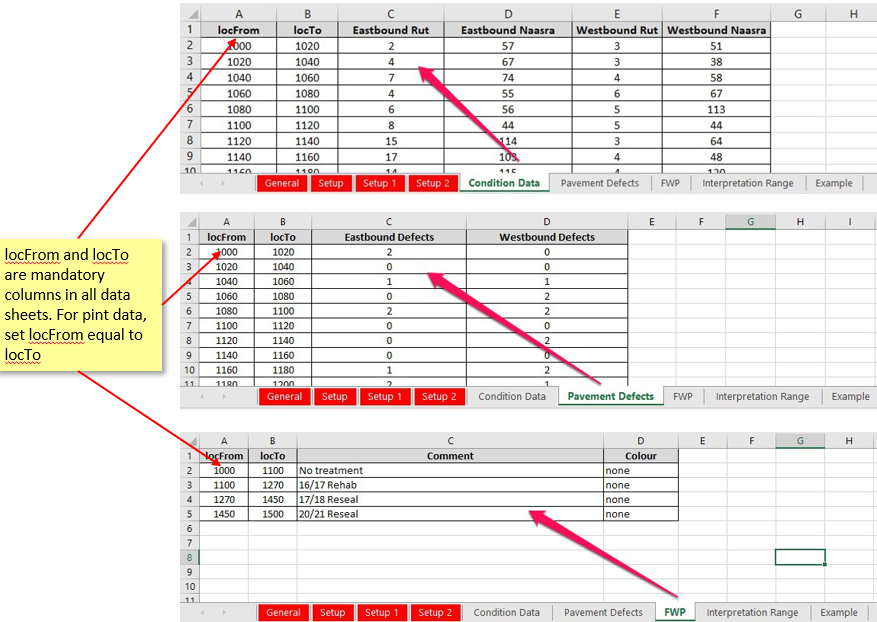
Data to populate the strips can be stored in as many or as few worksheets as required. Each sheet must contain locFrom and locTo columns in the first two columns, and only have one row of headings. For the example shown below, the data is separated into three sheets: Condition Data (for rutting and roughness), Pavement Defects, and FWP. Data sheets can be named by the user.
locFrom and locTo are mandatory columns in all data sheets, and must be in Columns A and B. For point data, set locFrom equal to locTo.

As well as setting up each strip in the Setup sheet, information on the location of the Stripmap and the optional shared titles is required in the Locations and Shared Titles worksheets. The images below contain details for each:

Data to populate the strips can be stored in as many or as few worksheets as required, however each must contain a locFrom and locTo column. For this example, the data is separated into three sheets: Condition Data (for rutting and roughness), Pavement Defects, and FWP.

An overview of the Setup worksheet can be found here, and detailed instructions for each strip type are available at the links below:
edited by philip@lonrix.com on 12/2/2016
edited by danielle.turner@lonrix.com on 12/14/2017
edited by tpotgieter on 1/24/2020
edited by on 4/15/2020
edited by on 11/23/2020
edited by on 6/1/2021
edited by on 2/15/2022
edited by on 2/15/2022
edited by on 10/31/2023
edited by on 11/24/2023
|
|
|
+1
link
|